
Of Witches Brew just for you!
Halloween is the perfect time for special tricks and treats - so how about etching a unique glass jug for your favorite spooky libations.

You'll need etchall® re-usable etching crème, etchmask (to cut your stencil), etchmask transfer paper, a Pik tool and a squeegee. IMPORTANT! Double check colored glass! I purchased an amber colored cider jug to etch my design, not realizing that the color was only a coating on top of clear glass. Coated glass will NOT etch, so I went back to the store and purchased a clear one.


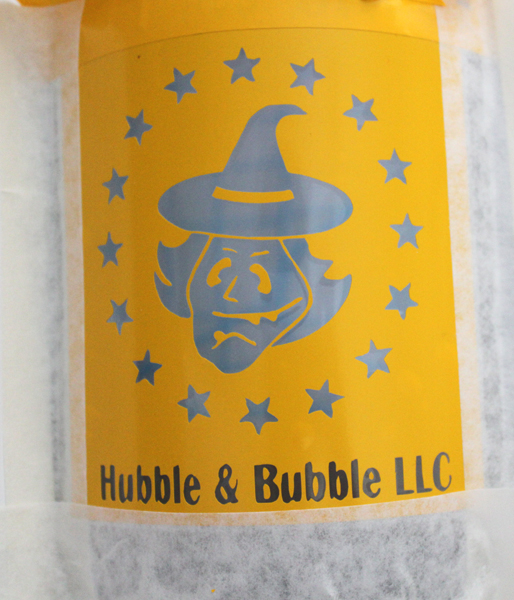
Step 4. Now let's etch the wording. While the stencil is still on the backing sheet, use the pik tool to remove the letters being careful not to lose the tiny pieces - dot for the "i", etc. This process is known as weeding. When you have finished weeding, cover with transfer paper, remove the backing paper from the stencil then position on the jug. Carefully remove the transfer paper, making sure that the tiny pieces for your stencil are still in place.


Step 6. Cover the edges with scraps of etchmask, or painter's tape. I covered the etched design below with a large piece of backing paper, then taped and re-taped everything in place, making sure that only my lettering could be covered with etching crème.

Step 7. Cover with etching creme then leave for 15 minutes. Scrape the crème back into the container, rinse away the residue, then remove the stencil, tape, etc. PLEASE remember that this is etching crème - do NOT rinse in a porcelain sink!! It will etch the glaze......
Glass etching is a great way to upcycle inexpensive glass pieces. You can personalize items for your home, for the holidays, for special occasions and to give as gifts. It's easy to do, but if you haven't etched glass before, please read all the directions on the container and check the etchall website for more information before starting your projects. You can also find lots of inspiration on Pinterest. Remember that etchall® etching crème and dip is RE-USABLE, so it will last a long, long time. Etchall provides the glass etching product for my etched glass posts, but you can order online directly from their website - use the code JULIEMC for 10% off. Enjoy! Y'all come back now........
Yours truly,
Julie :)
KEEP CALM AND CARRY ON CRAFTING!
No comments:
Post a Comment